Maintenance of battery
Most of us have had this experience in the past: instead of its usual lively sound, your starter motor sounds as if it is grinding to an agonising halt. The best thing is to keep your motorcycle battery regularly maintained and replace it as soon as it shows signs of becoming too old.

Note: The videos are in German.


- Motorcycle battery maintenance
- What are the different types of battery?
- Maintenance-free batteries
- Structure of a maintenance-free gel battery
- Maintenance-free lithium-ion battery
- Structure of a lithium-ion battery
- Standard acid battery
- Structure of a standard acid battery
- The 5 deadly sins of battery maintenance
- Important and worth knowing about starter batteries
- Maintenance of battery – now let's get started
- 01 – Remove the seat
- 02 – Remove cable
- 03 – Fill with acid
- 04 – Clean the battery
- 05 – Clean contact terminals
- 06 – Connect cable
- 07 – Grease terminals
- Our recommendation
Motorcycle battery maintenance
It's a story we're all familiar with: one fine morning, instead of its usual lively sound, your starter motor just gets slower and slower. The starter battery has had it. And as a reward, you can enjoy the pleasures of public transport, listen to your boss's frosty greeting when you arrive late, and spend your valuable free time at the local garage. To avoid all this hassle, all you have to do is take good care of your battery.
The battery is the essential energy store for the motorcycle, particularly if your bike has a battery ignition, as opposed to a magneto, which can independently sustain engine function.
The battery is fed by the charging current from the alternator, which can only be stored if the battery is in good working order. This means that the lead plates in the battery must not be overly sulphated, as this would eventually cause a short circuit between the battery plates. This would make the battery unusable. The acid level must be adequate and the battery terminals must not show any signs of oxidation.
As the battery runs down, lead sulphate forms on the lead plates. A small amount of sulphation therefore occurs continuously during operation. This process is reversed during charging. Crystals form during sulphation and continue to grow if the battery is not charged. If the crystal layer is too thick, it may not break down again during charging and the battery will consequently not be able to deliver its full output. Long idle periods and deep discharging must therefore always be avoided. It is also important to charge the battery fully as this is the only way to ensure the sulphate crystals will break down again. The fluid, or electrolyte, should ideally be continuously in motion due to charging and discharging. This prevents the sulphate crystals from growing.
A digital multimeter, or an acid tester if using a standard battery, will tell you the state of charge. In the case of 12 V batteries, a value above 12.7 V indicates a fully charged battery, 12.4 V indicates that the battery is 50% discharged, and 12 V indicates that the battery is completely drained. An intelligent charger delivers a more accurate diagnosis. This performs a test prior to charging. The result accurately reflects the state of the battery. Even if sufficient voltage is available, the battery may not be able to get the motor started as it is sulphated and cannot deliver enough power.
If your battery is in a poor state of charge, you should try and find out why. If you have only been riding your bike over short distances for quite some time, or if you haven't been riding it at all, then it is no surprise that the battery is flat. If that is the case then connect your battery to a charger and leave it until it is fully charged. If the battery is simply too old, it is best to replace it. However, if a new battery is not recharging even though you are riding your motorbike normally, the alternator, rectifier or regulator may be defective, or leakage currents may be the cause of the problem. If you are unable to rectify the problem with the help of a bike manual, you will need to talk to your local vehicle workshop.
If you are not going to be riding your bike for a prolonged period (longer than 3 months), it is better to pinch off or remove the battery, as there is a risk it will deep discharge or be drained by "hidden" electrical devices, like alarm systems, clocks, immobilisers or your sat nav. Ideally, you would connect it to an automatic battery maintainer or an intelligent charger. A standard battery that is not charged over the winter months will be irreparably damaged after 4 months.
If your vehicle is fitted with a large number of auxiliary electronic devices that would need to be recalibrated after removing the battery (sat nav, alarm system etc.), it is probably better to use an on-board charging socket so that you do not need to remove the battery. However, this only works if you have a maintenance-free battery.
What are the different types of battery?
Manufacturers generally fit a standard acid battery or a maintenance-free battery to their motorcycles: The principle of all acid batteries is the same: They consist of several lead plates. The positive plates are made of lead oxide, the negative plates of spongy lead. Diluted sulphuric acid between the plates serves as liquid electrolyte solution. Chemical energy and therefore electrical voltage is generated and stored when two different metals are immobilised in an electrolyte solution. If the terminals are connected outside the battery by a resistance, the battery is discharged, chemical energy is converted to electrical energy and current can flow.
Important: Battery acid is caustic, so always take great care when handling your battery if you remove it from your motorbike. If, in spite of due diligence, you manage to spill acid on your skin, wash off quickly with plenty of water. If acid comes into contact with your eyes, also consult a physician, if acid splashes on clothing this will normally cause holes. Acid will also damage the paintwork of your bike and generally causes the build-up of rust and acid corrosion, so always wash acid off paintwork with water immediately!
Maintenance-free batteries
In contrast to standard batteries, maintenance-free batteries do not contain liquid electrolyte. Instead the electrolyte is immobilised either in the form of a gel or in a fibreglass mat between the lead plates. Because these batteries barely lose any liquid to evaporation, they can be permanently closed after the first fill. There is no need to check their fluid level for the rest of their service life. There is no vent hose and the cells do not need to be opened for charging.
Gel batteries and some special AGM batteries are already filled and hermetically sealed when you buy them. A simple maintenance-free battery comes with an acid pack of suitable size (acid density 1.32 g/cm3); this acid is added to the battery before it is first used. The battery is then permanently sealed. Maintenance-free batteries can be charged whilst fitted on the motorcycle, e.g. using a charging socket. A suitable automatic charger for motorcycles must always be used see DIY tip Chargers.
That said, if a maintenance-free battery is deeply discharged, you need a special charge mode to bring it back to life. A basic automatic charger does not provide this function, so it's a good idea to get yourself an intelligent automatic charger – then you're ready for any eventuality.
While maintenance-free batteries, and particularly gel batteries, have lower self-discharge and a slightly better cold start performance than standard batteries, they are also more sensitive to overcharging (which is why it's essential to use an automatic charger which is designed specially for motorcycles). Check the range of your voltage controller if you are planning to change from standard to maintenance-free batteries.
AGM batteries are equipped with a safety valve which opens if too much current is flowing and fumes are being emitted internally. AGM batteries should only be installed upright (valve facing upwards) or slightly tilted, and not upside down as otherwise acid may also leak out.
AGM batteries are batteries containing microfleece consisting of glass fibre mats. AGM batteries have a higher end-of-charge voltage of 14.7 V.
Pure lead batteries are also AGM batteries (MF). In contrast to normal MF batteries, these batteries (as the name already indicates) contain anode and cathode plates which are made of pure lead (or with silver additive). This reduces the internal resistance which means that current flows more easily. This undoubtedly has significant benefits such as reduced self-discharging and lower tendency towards deep discharging. However, the weight of the battery is higher due to the high-quality grid-type plates used.
Both AGM and pure-lead batteries have a very good cold start performance and incorporate durable technology.
In gel batteries, the electrolyte is immobilised in silicic acid. This produces a gelatinous mass which cannot emit fumes. It can therefore be installed in any position. A further benefit of the gelatinous electrolyte is that it makes the battery resistant to vibrations: the internal lead plates cannot touch one another due to vibrations.

Structure of a maintenance-free gel battery
Structure of a maintenance-free gel battery
a) Special grid design: Multi-alloys ensure high degree of conductivity and corrosion resistance.
b) Special active material: Extended lifetime and higher reliability.
c) Continuous plate set connections: Lower internal resistance due to shorter current paths for more starting power.
d) Gelatinous electrolyte: Leak proof, low self-discharging and very high starting power.
Maintenance-free lithium-ion battery
Lithium-ion batteries represent the latest and most powerful battery technology. As cells they contain several individual battery packs. Two different metal foils (normally copper and aluminium) are used for the anode and cathode of these batteries. They are separated from one another by an ion-permeable plastic foil and embedded in lithium-based electrolyte which does not contain acid or water and still allows the migration of ions.
Lithium-ion batteries have a very low self-discharge and high life expectancy, providing they are cared for and used correctly. They can endure around ten times as many charging cycles as lead batteries, are resistant to vibrations and can be installed in any position. Compared to other batteries, they are compact and extremely light. They can however only be charged using a special charger for lithium-ion batteries. Their performance is impaired by excessively high or low temperatures and they should therefore only be used at temperatures between -10°C and +45°C.

Structure of a lithium-ion battery
Structure of a lithium-ion battery
a) Terminal cover: Avoids short circuits.
b) Battery management system: Regulates the state of charge of the single cells and guarantees the highest level of safety.
c) Battery packs: Contain lithium cells and are characterised, among other things, by their high energy density and extremely low self-discharge.
d) Brass terminal connectors: For outstanding conductivity.
e) Charge level indicator: Easy identification of state of charge.
f) Nylon housing: Specially developed material and therefore extremely resilient.

Acid corrosion
Standard acid battery
This good value battery type is particularly prevalent on older models of motorcycle. A new standard battery must be filled up with acid – not with water! – (density 1.28 g/cm3). Standard acid batteries produce fumes which is why they have a ventilation opening to which a hose is attached. This hose routes the fumes to where they cannot cause any damage, normally under the engine. Due to the ventilation opening, standard acid batteries can only be installed upright (with the opening facing upwards), as otherwise the acid would run out.
Standard batteries must be charged with open cells and removed from the vehicle to prevent the build-up of acid vapours in the vehicle.

Measure acid density
You can test the state of charge using an acid tester. To do this, open the plugs on the individual battery cells and draw off a little acid into an acid tester by squeezing the suction bulb then guiding the suction pipe into the battery cell. Now release the suction bulb and draw in enough battery acid to allow the float to float freely. The float in the test device tells you the state of charge: The flatter the battery, the lower the acid density and the lower the position of the float. Fully charged batteries have an acid density of 1.28 g/cm3, while flat batteries have an acid density of 1.11 g/cm3, and 1.20 g/cm3 would indicate a 50% discharge.
Please note: Carefully read through the instructions for use of the acid tester!
The state of charge of each individual battery cell should be pretty much the same – if this is not the case, the battery is defective. You should therefore check all cells.
After using the acid tester, clean it with water. If the fluid level of a standard battery has dropped, top up the individual battery cells with deionised water to the maximum marking (check roughly once a month). Do not add acid, as this is only used for the first fill. By adding acid at a later date you would increase the acid concentration to an inadmissible level. Once you have topped the battery up with water, recharge it with the charger. During charging (always make sure you have removed the cell covers) explosive gases build up in the battery – so it is essential to ensure that the room is well ventilated, that there are no naked flames of any kind near the battery, that the no smoking rule is observed and that there is no risk of sparks.

Structure of a standard acid battery
Structure of a standard acid battery
a) Special separators: For greater starting power and longer lifetime.
b) Grid made of highly stable alloy material: For maximum starting power and vibration resistance.
c) Dry charging of plates: Battery is already precharged due to initial filling with the electrolyte.
d) Sealed terminals: Longer lifetime due to protection against fluid loss and corrosion.
e) Continuous plate set connections: For greater cranking power.
The 5 deadly sins of battery maintenance
- DO NOT: apply battery terminal grease between the terminal and terminal clamp – battery terminal grease does not conduct electricity!
- DO NOT: charge the battery all winter – recharge every 2 months at the latest.
- DO NOT: top up filled standard batteries with acid – use deionised water for this.
- DO NOT: use the wrong type of charger – depending on the battery type, a special charger is required.
- DO NOT: open maintenance-free batteries – the cover must remain closed and they must not be topped up!
Important and worth knowing about starter batteries
| Battery pre-charged? | Fill with acid? | Maintenance? (= regular checks of the acid level?) | Storage of acid | |
|---|---|---|---|---|
| Standard batteries | Yes, partially charged in dry charge. Prior to installation, you will need to fully charge the battery using a suitable motorcycle charger. | Yes, you will need to order acid separately. All information on acid quantities can be found on the product pages. | Yes! Check the acid level approx. once a month. Only top up with deionised (or distilled) water, if necessary. Never use acid to top up after the first fill! | Free liquid. |
| Maintenance-free batteries delivered dry, incl. acid pack | Yes, partially charged in dry charge. Prior to installation, you will need to fully charge the battery using a suitable motorcycle charger. | Yes, the right acid pack with the exact quantity of acid is always included. Never use any other acid to fill the battery, but only the acid pack supplied! | No, after the first fill the battery is sealed and is then maintenance-free for the entirety of its service life. Under no circumstances should it be re-opened! The battery no longer needs to be topped up with deionised (or distilled) water or acid; this is in fact expressly forbidden as it would irreparably damage the battery! | Immobilised in microfleece. |
| Maintenance-free batteries delivered pre-filled with acid and sealed | Yes, partially charged. Prior to installation, you will need to fully charge the battery using a suitable motorcycle charger. | No! Under no circumstances must the battery be opened and filled with acid, as it is already pre-filled. After being fully charged the battery is ready to install! | No, this battery is maintenance-free for the entirety of its service life! Under no circumstances must it be opened! Never top up this battery using deionised (or distilled) water or acid as this would irreparably damage the battery! | Immobilised in microfleece. |
| Maintenance-free batteries delivered pre-filled with gel substance and hermetically sealed | Yes, partially charged. Prior to installation, you will need to fully charge the battery using a suitable motorcycle charger. | No! Under no circumstances must the battery be opened and filled with acid, as it is already pre-filled with gel. After being fully charged the battery is ready to install! | No, this battery is sealed and maintenance-free for the entirety of its service life! Under no circumstances must it be opened! | Electrolyte mixture immobilised in gel substance. |
| Maintenance-free batteries with pure lead technology | Yes, partially charged. Prior to installation, you will need to fully charge the battery using a suitable motorcycle charger. | No! Under no circumstances should the battery be opened. | No, this battery is sealed and maintenance-free for the entirety of its service life! Under no circumstances must it be opened! | Immobilised in an absorbent glass fleece in combination with pure lead thin plates. The acid is completely absorbed due to the glass fleece technology. This means the battery can be installed in any position. |
| Maintenance-free batteries with lithium-ion technology | Yes, partially charged. Prior to installation, you will need to fully charge the battery using a special lithium-ion battery charger. | No! Under no circumstances should the battery be opened. It contains dry cells. After being fully charged the battery is ready to install! | No, this battery is sealed and maintenance-free for the entirety of its service life! Under no circumstances must it be opened! | The acid free, lithium-based electrolyte is welded in several individual battery packs. |
Maintenance of battery – now let's get started

Step 1: Remove the seat
01 – Remove the seat
When choosing a battery, check that it complies with the vehicle manufacturer's specifications, i.e. be sure to check the model designation, dimensions, voltage (6 V or 12 V), amperage and the position of the battery terminals and vent. First remove the seat and – BEFORE you fill and install the battery – double check that the battery is the right size and that the terminals are in the right position.

Step 2: First disconnect the negative cable and then the the positive
02 – Remove cable
To prevent short circuits to the vehicle frame when removing the battery, always make sure that you disconnect the negative cable first, then the positive cable!
When recharging your battery, do not use a charger with a high amp rating from your local car accessories shop or the local DIY store. Only use chargers specially designed for motorcycles. While high amp chargers work faster, the charging current is too high, and will damage the relatively small motorcycle battery.

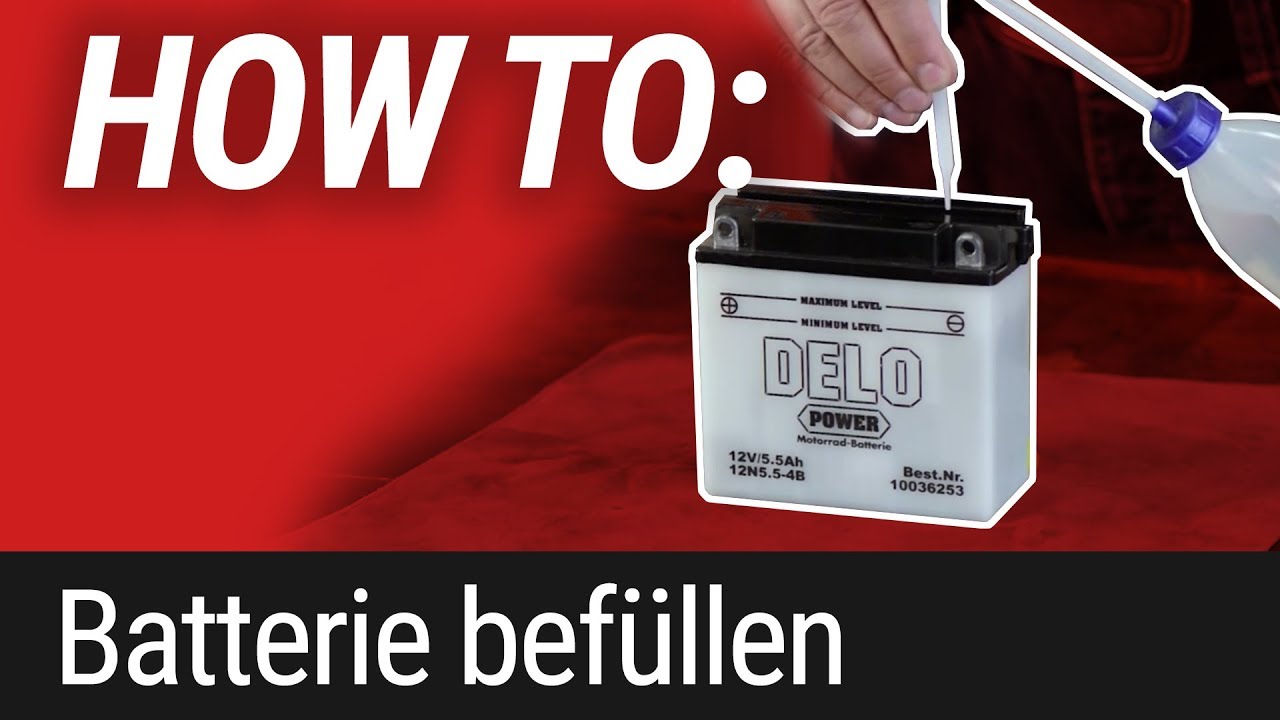
Step 3: Fill with acid
03 – Fill with acid
Use a battery acid bottle or a small funnel to top up a standard battery to the maximum level with battery acid. The battery should be placed on an acid-resistant surface! The battery will emit fumes during filling – that is quite normal.
All batteries are factory activated (partially precharged), but you will still need to connect the battery to a charger initially in order to fully charge it.
If you are using a standard battery, leave the cells to breathe for approx. 2 hours post-charge, re-check the level and then replace the covers. Before installing the battery, carefully wash off any spilled acid.

Step 4, Fig. 1: Clean outside of battery
04 – Clean the battery
Clean the outside of the battery prior to installation, as any dirt or soiling may well cause leakage currents and loss of charge. Do this by spraying the battery with a total motorcycle cleaner, clean it with a brush then rinse off with water.

Step 4, Fig. 2: Clean battery terminals
If the battery terminals are soiled, clean them with a brass wire brush.

Step 5: Clean contact terminals
05 – Clean contact terminals
Also clean the contact terminals of the battery power cable.

Step 6: Connect the positive cable first and then the negative
06 – Connect cable
Always connect the positive cable first and then the negative cable. Make sure you do not mix up the terminals – this would not only damage the new battery, it may also irreparably damage your bike's generator and electrical system!

Step 7: Grease the connected terminals
07 – Grease terminals
Lubricate the connected terminals with a little PROCYCLE battery terminal grease. If you have a standard battery, make sure there are no kinks in the vent hose.
Our recommendation
The Louis Technical Centre
If you have a technical question about your motorbike, please contact our Technical Centre, where they have endless experience, reference books and contacts.
Please note!
These tips for DIY mechanics contain general recommendations that may not apply to all vehicles or all individual components. As local conditions may vary considerably, we are unable to guarantee the correctness of information in these tips for DIY mechanics.
Thank you for your understanding.